To add a contact to the Customer record:
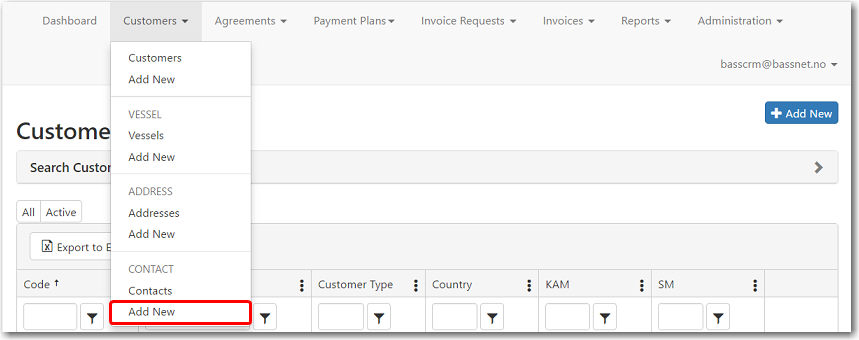
1. Go to the Customers tab and click Add New under Contact.
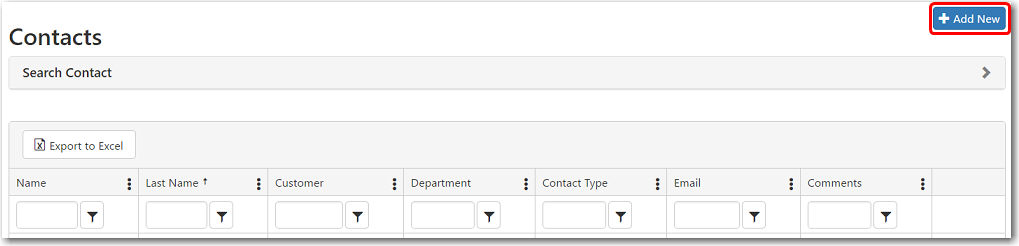
You can also add a new contact by clicking Add New on the Contacts page.
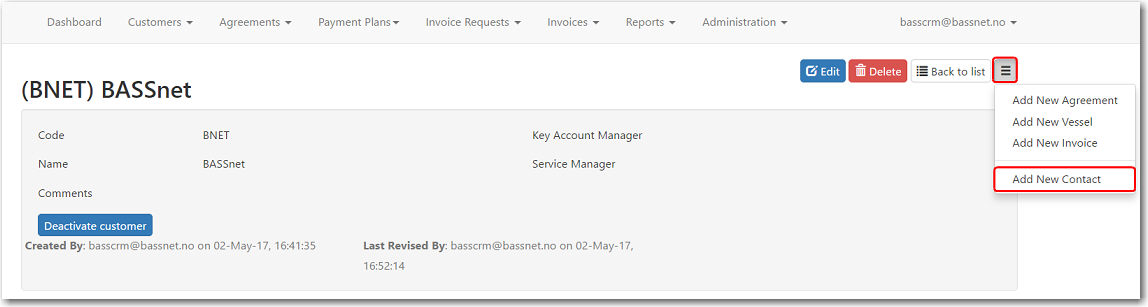
Alternatively, you can click Add New Contact from the Customer's Details page. This will open the Add a new Contact page with the particular Customer pre-selected.
2. The Add a new Contact screen is displayed. Here, you may insert the details of a new contact for the customer.
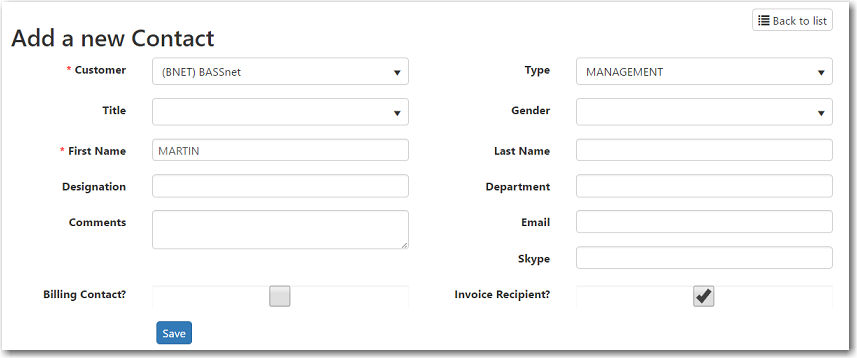
The following table provides you with more information on the available fields:
Field |
Description |
Customer |
Select the customer with which this contact is affiliated. |
| Type | Select if this contact is a decision maker, management, superintendent, etc, of the company. |
| Title | Select a prefix as a title or official position. For example: Mr., Ms., Dr. or Capt. |
| Gender | Select if this customer is male or female. |
| First Name | Enter the contact's first name. |
| Last Name | Enter the contact's last name. |
| Designation | Enter any professional designations that is earned by the contact. |
| Department | Enter the department the contact |
| Comments | Enter any additional comments regarding this contact. |
| Enter the contact's email address. The System will send billing information and/or the final invoice to this email. | |
| Skype | Enter the contact's Skype user name for easy communication. |
| Billing Contact | Select this check box to be able to select this contact to receive the billing information. |
| Invoice Recipient | Select
this check box to include this contact in the selection
as invoice recipient after the invoice has been approved.
Make sure that the email field is completed with a valid email address. |
3. After you have entered all the necessary information, click Save. The System will display the Created By and Last Revised By dates.
4. Click Details to open the customer's Details page, or click Back to list to return to the main page of the Customers module.