To view an overview of planned crew:
1. From the HR Manager main menu, click Planning Overview under the Planning menu.
2. The Planning Overview screen is displayed. Select the Vessel(s) for which you are planning.

3. Use the search fields to carry out a search for the planned crew you want to view. In the Date and To date fields, enter a date range within which the search should be carried out.
4. Then, in the Vessel field, select the Vessel/s that you want to display in the Planner. You may make your selection from the Vessel Lookup window as well. Alternatively, if you do not make a selection here, then planned crew from all vessels will be displayed.
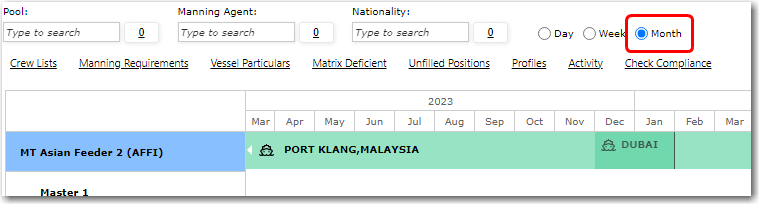
5. In the Pool and Manning Agent field, you can filter the overview of the crew planning that you have carried out for you vessel by Pool or Manning Agent, respectively.
6. In the Rank field, you can choose to narrow the crew that will appear in the planner based on their Ranks. Only the Ranks selected will be displayed in the planner. Alternatively, if you do not make a selection here, then all Ranks for which activities have been planned within the specified date range will be displayed.
7. Finally, in the Nationality field, you can filter the overview of the crew planning by Nationality.
You can also select the Unfilled Positions Only check box to only display vacant positions. This is to make it easier for you to plan and assign crew for unfilled positions.
Select the Manning Requirements check box to allow the system to check the manning requirements for the selected vessel(s) based on the setup on the Manning Requirements screen. The numbers displayed next to the ranks indicate the number of positions required for that particular rank. Select the Matrix check box to allow the system to check based on the setup on the Manning Requirements screen.
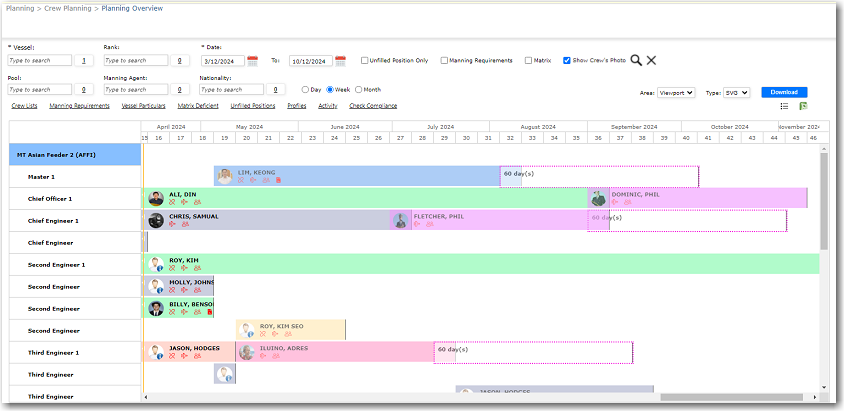
8. Click the Search icon. The planned crew based on your search criteria will be displayed in the Planning Overview.
(Note: The information displayed can be sorted by Vessel. The sorting of these vessels will follow the Sequence Number and then the Vessel Name, as setup on the Vessel Particulars screen of each Vessel.)
Clear the Show Crew's Photo check box to remove the crew's profile picture from being displayed in the Planner.
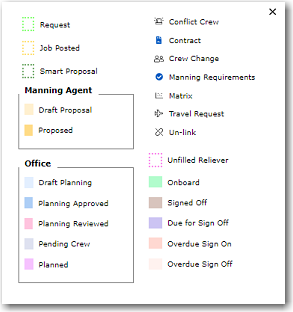
Click the Legend icon to help you quickly see the status of the crew planning activities in the Planner.
|
Legend |
Description |
|
Request |
Request manning agent to submit proposal to fill up the position |
|
Job Posted |
Job posted to the recruitment/manning agent |
|
Smart Proposal |
The system automatically propose based on the criteria that the user has defined |
|
Manning Agents |
Draft Proposal - Draft proposal created by manning agent. Office user can view but will not be able to proceed.
Proposed - Proposal proposed to office. Office user will be able to proceed with the next status by approving.
Note: If Manning Agent act as an office user, they will have the right to review and approve. |
|
Office |
Draft Planning - Initial planning has been drafted, but not yet approved
Planning Approved - Planning has been approved by the appropriate approver
Planning Reviewed - Planning has been reviewed by the appropriate user
Pending Crew - Awaiting confirmation from the crew
Planned - Planning is completed and finalised |
|
Conflict Crew |
Icon to indicate that there is a conflict crew planned for that period. This is based on the Conflict Crew selected on the Crew Administration screen (see Using the Crew Administration). |
|
Contract |
To indicate a missing contract (no wages tied to it) |
|
Crew Change |
To indicate that the crew is not defined under planned crew change |
|
Manning Requirements |
To indicate issues in the manning requirements (i.e. documents expired, etc) |
|
Matrix |
To indicate issues in the matrix requirements (i.e. crew does not comply with min years of exp, etc) |
|
Travel Request |
To indicate missing travel request for sign on |
|
Unlink |
To indicate that two crew members are unlinked |
|
Unfilled Reliever |
To indicate that there is an unfilled reliever |
|
Onboard |
To indicate that this crew is currently onboard |
|
Signed Off |
To indicate that the crew has signed off |
|
Due for Sign Off |
To indicate that the crew is due for sign off |
|
Overdue Sign On |
To indicate that the crew is overdue for sign on |
|
Overdue Sign Off |
To indicate that the crew is overdue for sign off |
Note: Back-end configurations are available to hide certain statuses if they are not required. For more information on this, please contact BASS Support.
Switch Views:
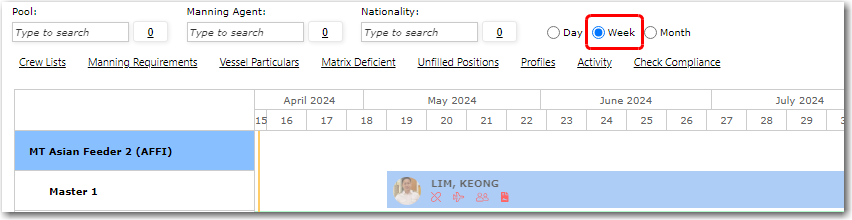
Using the available drop down list, you can switch between a Daily, Weekly or Monthly View.
a) Daily View

b) Weekly View:
c) Monthly View:
Make Adjustments:
You can make date adjustments as required by dragging the side of the timeline of a particular crew member. Please note that you can only make adjustments based on future dates. Any changes made will be automatically reflected in the crew member's Activity records after you save the change.

You can also drag the entire timeline to a different role or vessel if required.
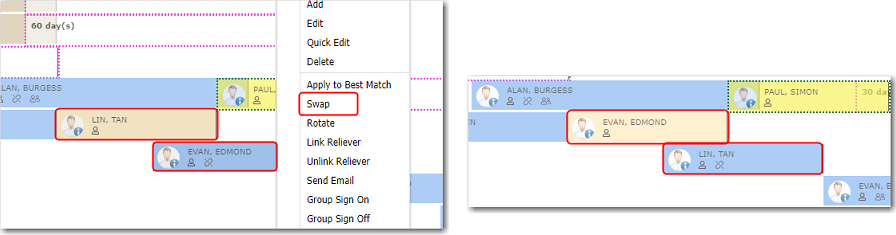
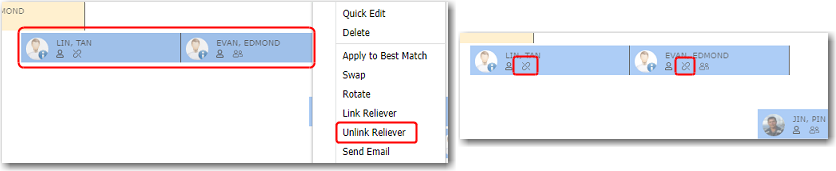
You can also select two timelines, right click and click Swap to swap the crew members selected for both timelines (see section below).
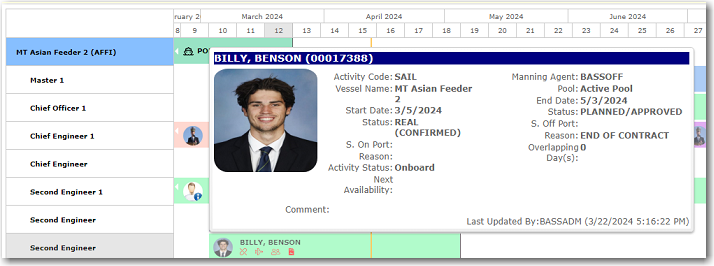
View Details:
You can mouse-over a crew member's name in the planner to view the details of his schedule for a particular period, for instance, to check if the crew member will be sailing or on a course on that date. Comments made on the Activity Details screen are also displayed in this pop-up.
Search for Reliever or Plan Specific Crew
Please refer to the topic: Search for Reliever or Plan Specific Crew.
Smart Proposal
You can also use the Smart Proposal button to fill in any Unfilled Reliever boxes for any rank in the vessel.
1. On the Planning Overview screen, select the Date From and To period, the Vessel and the Rank for which the Unfilled Reliever box that you want to fill, and right-click and select Best Match to open the Best Match screen.
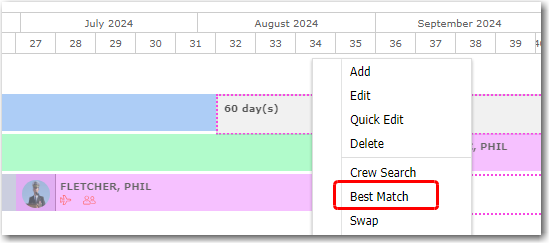
Note: You can also select the Unfilled Positions Only check box to only display vacant positions. This is to make it easier for you to plan and assign crew for unfilled positions.
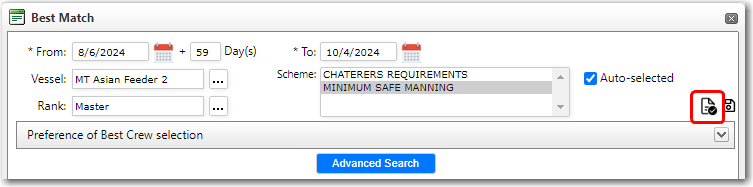
2. Then, click the Smart Proposal icon. The system will automatically fill in any Unfilled Reliever boxes for that rank in the selected period.
3. Office users can then right click on the boxes that were filled by Smart Proposal and change the status of the activity.
Export/Download the Planner:
Click the Export to Excel icon on the Planning Overview screen to export the currently displayed planner (based on your search criteria) by vessel or rank, respectively, to a Microsoft Excel file.

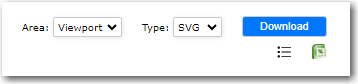
You can also use the Download function to either download in SVG, PNG or JPEG:
Viewport - Only the data in the period area currently displayed will be downloaded
Full - The full data for the selected crew will be downloaded
Display crew members on multiple vessels:
If you have selected more than one vessel, then the crew members will be displayed for the multiple vessels. Crew rotating on all the selected vessels will be displayed as well: