Search for Reliever or Plan Specific Crew |
On the Planning Overview screen, you can drag your cursor to define a time period in the planner and then right-click for options to search for a reliever or plan an activity for a specific crew.
Screen Navigation: Planning - Crew Planning - Planning Overview
![]() Jump
to topic:
Jump
to topic:
Plan Activity for a Specific Crew
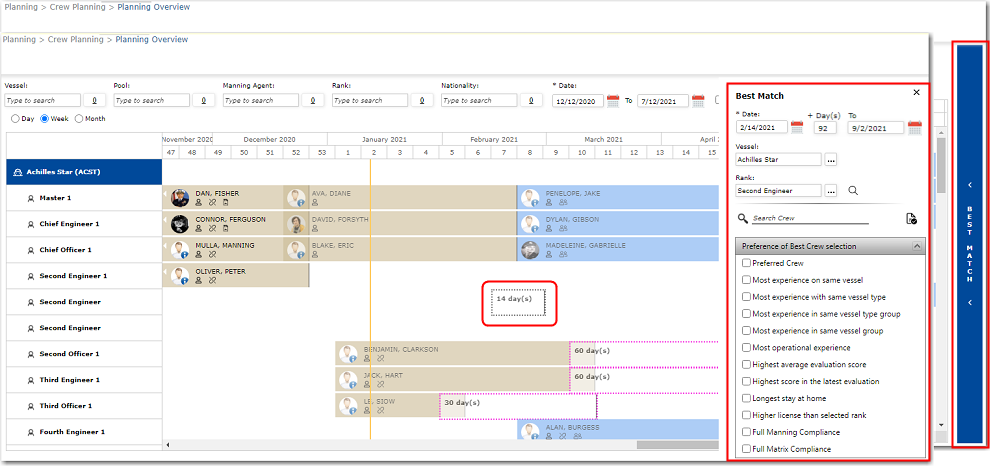
1. From the HR Manager main menu, click Planning Overview under the Planning menu. 2. The Planning Overview screen is displayed. On the Planning Overview screen, select a time period in the planner for which you would like to plan an activity. 3. The Best Match pop-up section will automatically be displayed. 4. In the Best Match Crew section, refine the search by filling in the search criteria fields. The following table provides you with more information on the available fields.
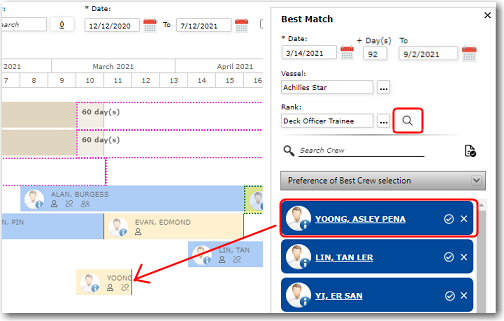
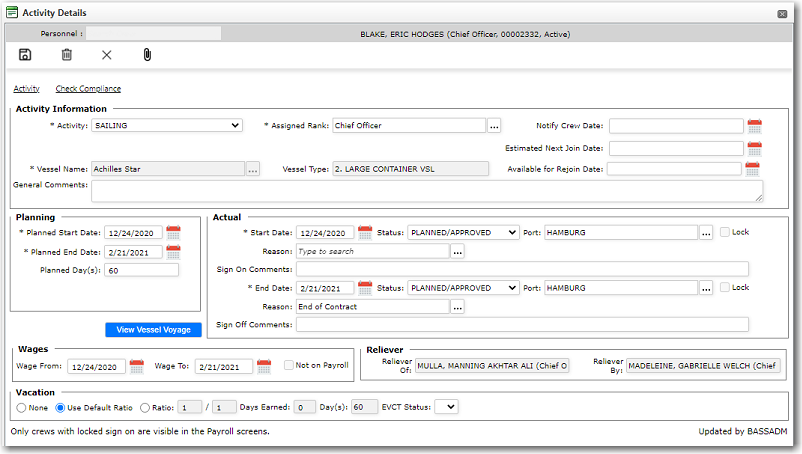
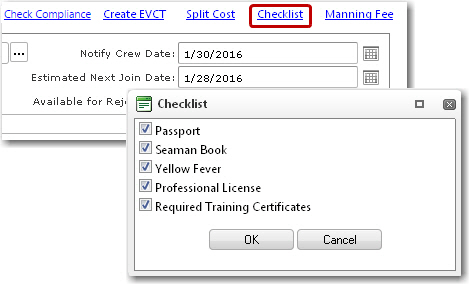
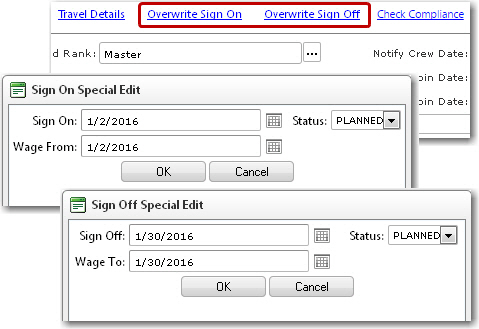
5. Click Search. A list of crew members that fit the criteria you entered will be listed. Click on a crew member's name to view their profile. You can also click the check compliance icon beside the crew's name to open the Check Compliance screen for the selected crew. 6. Select the crew member for the activity and drag their name to the selected time period. To edit the details of the activity, right click on the activity and select Edit. The Activity Details pop-window will be displayed. 8. Enter the details of the activity for the selected crew member and then click Save.
|
||||||||||||||||||||||||||||||||||||||||||||||||||||||||||||||||||||||||||||||||||||
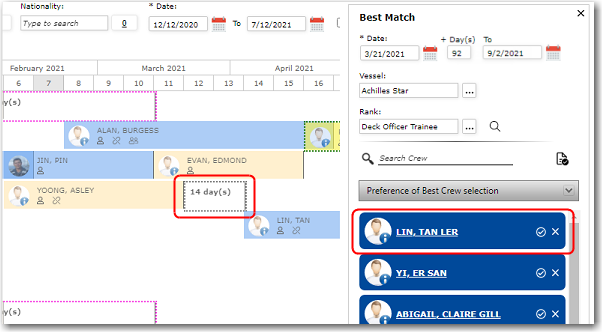
1. From the HR Manager main menu, click Planning Overview under the Planning menu. 2. The Planning Overview screen is displayed. Select the criteria above and click the Search icon. You can also select the Unfilled Positions Only check box to only display vacant positions. This is to make it easier for you to plan and assign crew for unfilled positions. 3. On the Planning Overview screen, select a time period in the planner to relieve another crew member. 4. The Best Match pop-up section will automatically be displayed. 5. In the Best Match Crew section, refine the search by filling in the search criteria fields. The following table provides you with more information on the available fields.
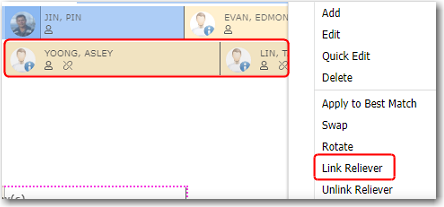
6. Click Search. A list of crew members that fit the criteria you entered will be listed. Click on a crew member's name to view their profile. You can also click the check compliance icon beside the crew's name to open the Check Compliance screen for the selected crew. 7. Select the crew member you would like to assign as a reliever and drag their name to the selected time period. To edit the details of the activity, right click on the activity and select Edit. The Activity Details pop-window will be displayed. 8. Select both crew members, then right click and select Link Reliever. The Unlink icon will disappear from the reliever's timeline to indicate that the reliever has been linked.
|
Using Smart Proposal to Assign Reliever
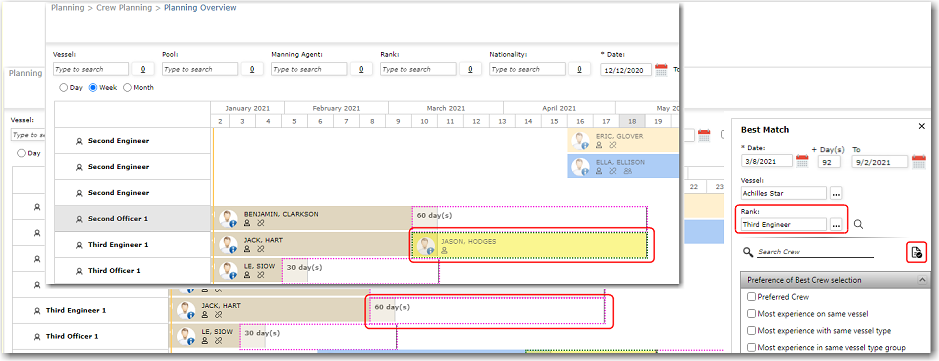
You can also use the Smart Proposal button to fill in any Unfilled Reliever boxes for any rank in the vessel. 1. On the Planning Overview screen, select the criteria above and click the Search icon. You can also select the Unfilled Positions Only check box to only display vacant positions. This is to make it easier for you to plan and assign crew for unfilled positions. 2. Open the Best Match section. 3. Select the Date From and To period, the Vessel and the Rank for which the Unfilled Reliever box that you want to fill. 4. Then, click the Smart Proposal icon. The system will automatically fill in any Unfilled Reliever boxes for that rank in the selected period. 4. Office users can then right click on the boxes that were filled by Smart Proposal and change the status of the activity.
|
![]() What
would you like to do?
What
would you like to do?