|
Creating a New Credit Note |
Screen Navigation: Invoices - Credit Notes
A Credit Note is issued for items or services that were not paid in full (possibly due to a discount) to account for the remaining balance.
For example, if a license costs $1,000 in the agreement but the customer will only pay $800, an invoice will be created for $800 and a credit note will be created for the remaining $200. As such, Credit Notes can only be created in the CRM system after an invoice has been sent to the customer.
A new Credit Notes tab will be available on the Invoice Details screen for you to add, edit or delete credit notes.
![]() Jump directly to topic:
Jump directly to topic:
Create a New Credit Note
|
To create a new Credit Note:
1. On the Invoice Details page, click the Credit Notes tab.
2. To add a new credit note, click Create Credit Note.
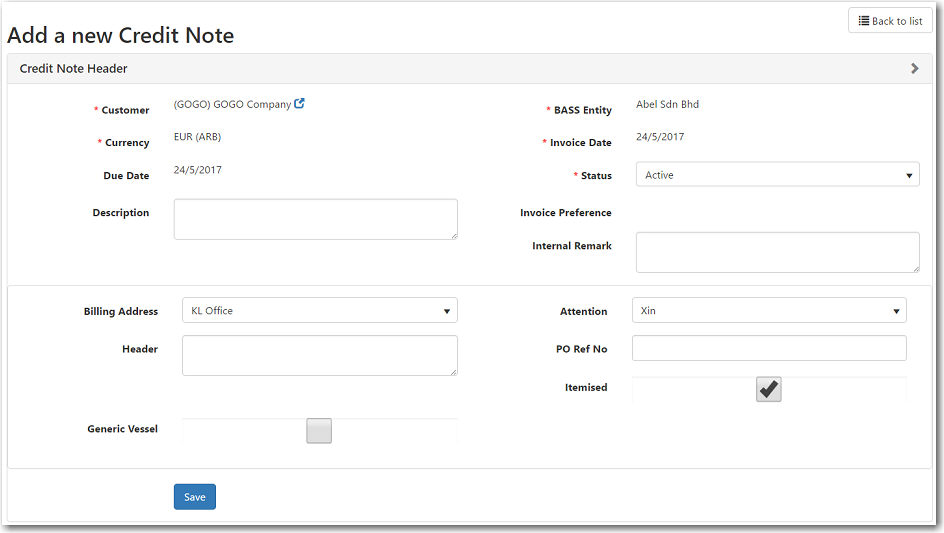
3. The Add a new Credit Note page will be displayed.
The following table provides you with more information on the available fields:
3. After you have entered all the necessary information, click Save. The System will record the Created By and Last Revised By dates.
4. A new section will be available below for you to select a Recipient from the list of contacts (with the Invoice Recipient check box selected).
The other fields in this section will be automatically populated once the credit note is approved and sent to the recipient.
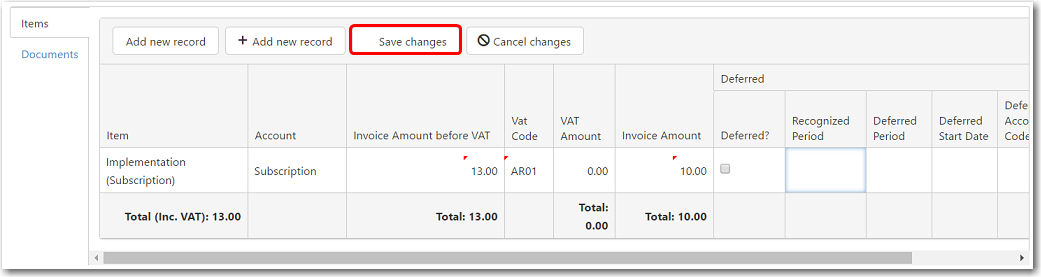
5. Under the Items tab below, click Add to be Invoiced Items to add items from an invoice request. Alternatively, click Add new record to add a blank item row which you can manually define.
If you clicked Add to be Invoiced Items, the fields will automatically be filled based on the details in the invoice request.
The following table provides you with more information on the available fields:
6. As you make changes, a red arrow will appear at the top left of the field indicating that there are changes that have not been saved. Click Save changes to confirm.
7. To attach documents related to this credit note, open the Documents tab and click Select Files.
8. Finally, click Save to add the credit note.
|
|
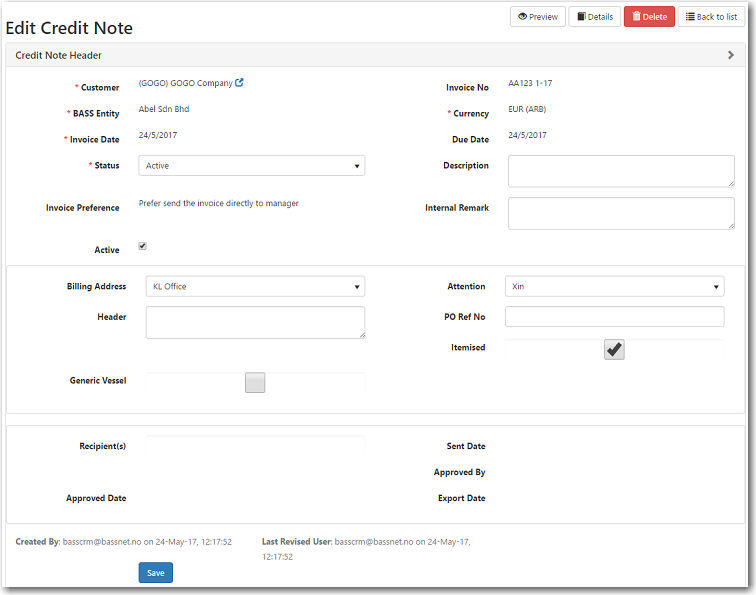
To edit the details of a credit note:
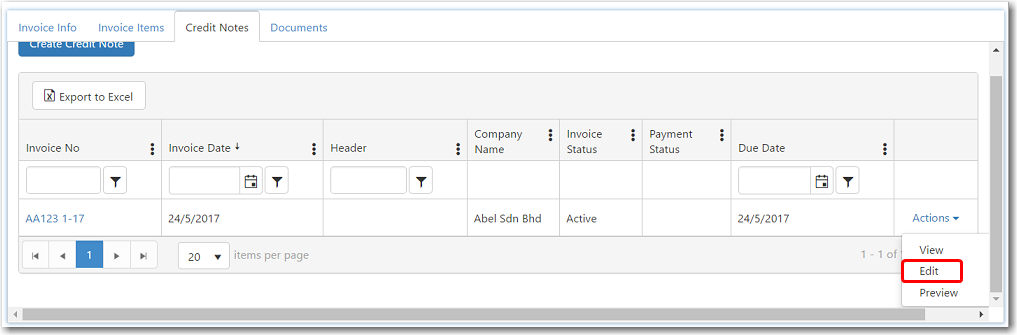
1. On the Invoice Details page, click the Credit Notes tab. Choose the credit note you would like to edit and click Actions then select Edit.
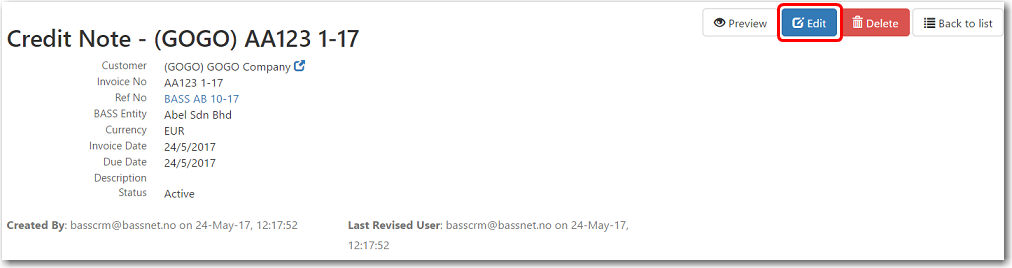
Alternatively, you can also click Edit on the credit note Details page.
2. The Edit Credit Note page will be displayed. Here, you may edit the details of the credit note.
3. Click Save to make the changes permanent. The Last Revised By date will be updated accordingly.
4. As you make changes to items in the table, a red arrow will appear at the top left of the field indicating that there are changes that have not been saved.
Click Save changes to confirm.
5. Finally, click Save.
|
|
To delete a credit note from the System:
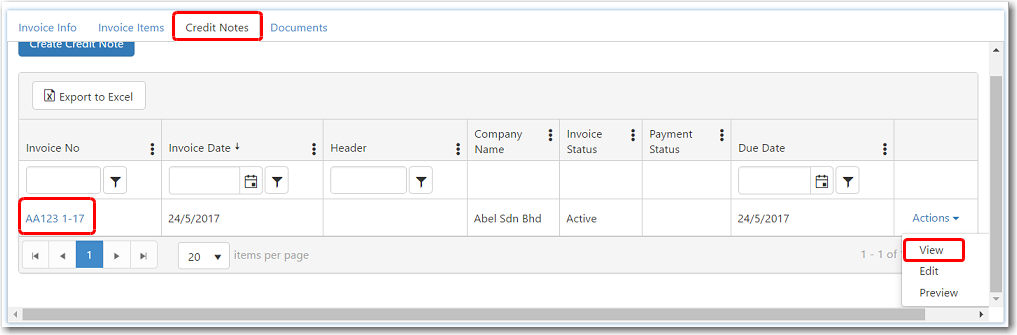
1. On the Invoice Details page, click the Credit Notes tab.
2. Choose the credit note you would like to delete and click the link under the Invoice Number column to open the Details page. Alternatively, click Actions and select View to open the Details page.
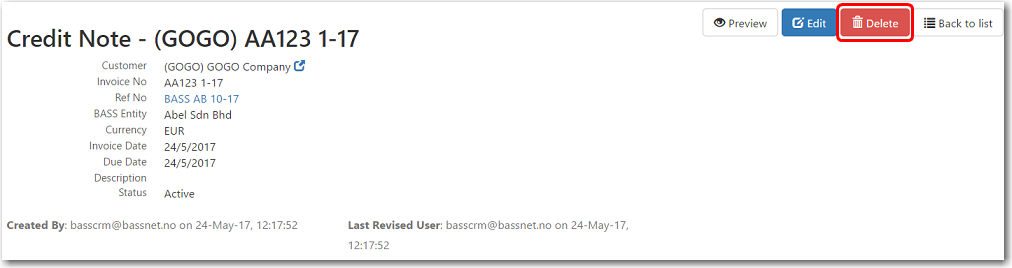
2. The credit note Details screen will be displayed. To delete the credit note, click Delete.
3. Click OK to confirm.
|
|
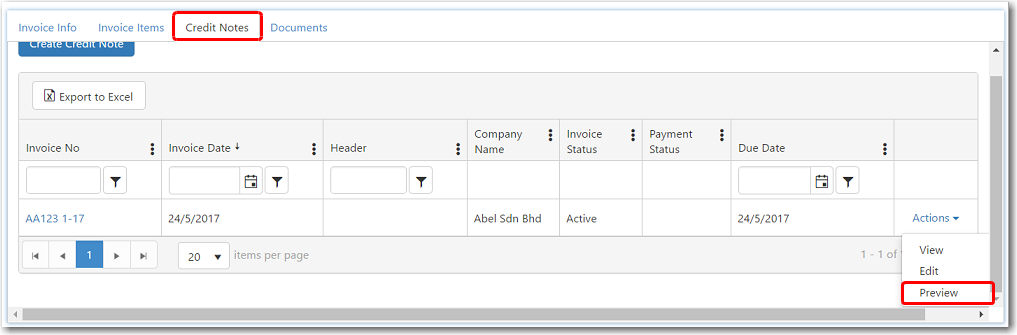
To preview a credit note:
1. On the Invoice Details page, click the Credit Notes tab.
2. Choose the credit note you would like to preview and click Actions then select Preview to preview the credit note.
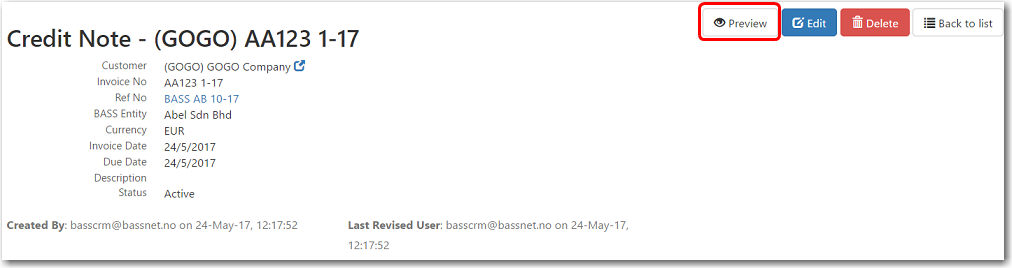
Alternatively, you can also click Preview on the credit note Details screen.
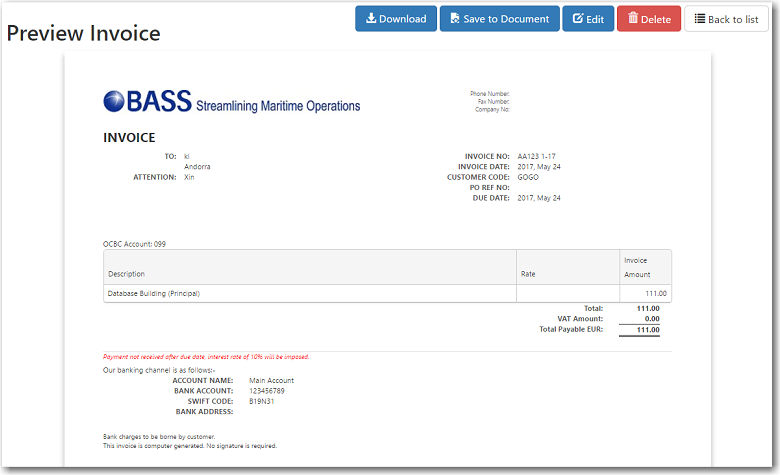
2. The Preview Invoice screen will be displayed.
3. Click Download or Save to Document to save a copy of the credit note.
4. To make any adjustments to the credit note, click Edit.
|
![]() What would you like to do?
What would you like to do?