|
Customising the Work Environment |
![]() Jump directly to topic:
Jump directly to topic:
|
To move between pages on the listing page:
1. You can use the toolbar available at the top (and bottom) of the listing page to move from one page to another.
The following table explains the buttons in the toolbar:
|
|
To customise what appears on the listing page:
1. You can choose how many records you would like to appear on a page. On the listing page, click the button for Items per page.
2. You can then choose between having 10, 50, 100, 200, 500 and 1000 records displayed on each page.
|
|
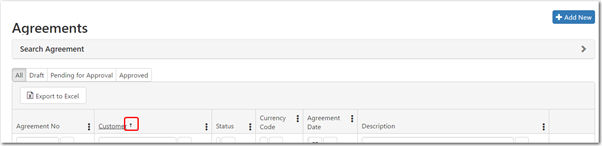
To sort the order of data in a column using the toggle function:
1. On the listing page, click the column header. Note that an arrow will appear on the header.
2. Toggle between the sort orders.
Ascending Order:
Note: The arrow in the column header pointing upwards indicates the data being sorted into ascending order.
Descending Order:
Note: The arrow in the column header pointing downwards indicates the data being sorted into descending order.
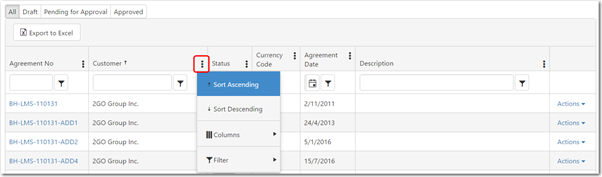
3. Alternatively, you can also sort by right-clicking any column header and choosing one of the sorting options available in the drop-down menu.
The following table provides you with more information on the available options:
|
|
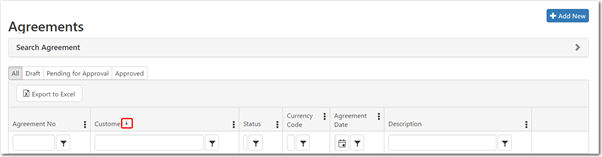
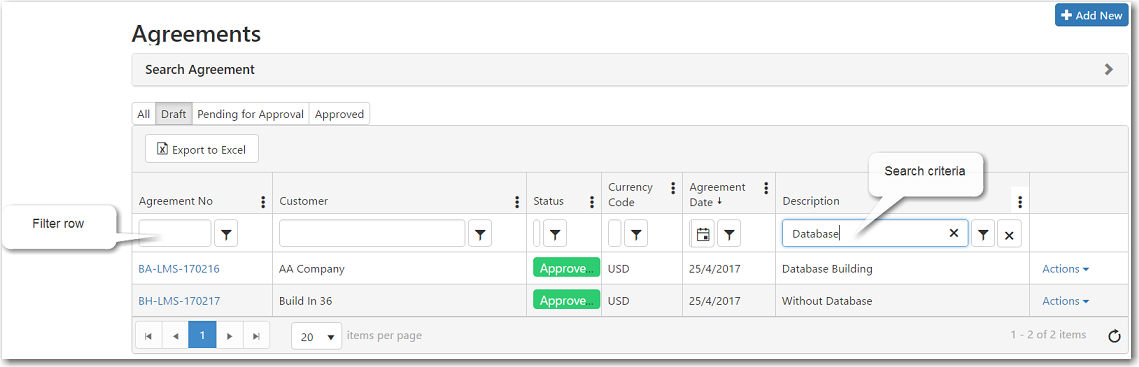
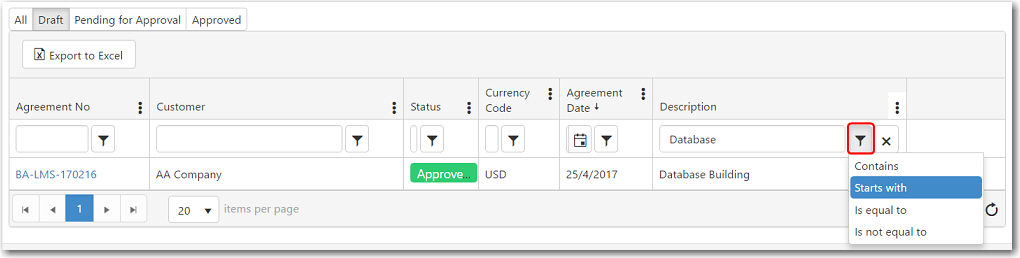
To use search filters:
1. Click the filter for the required field.
2. Type in the criteria of your search.
3. Press Enter on your keyboard. The result will be displayed in the record list.
4. By default, the filter row is set to display results that contain the inserted criteria. However, you can click on the Filter button to change the criteria settings.
Additionally, you can click on the icon to the right of the column header and mouse-over the Filter option to add more criteria.
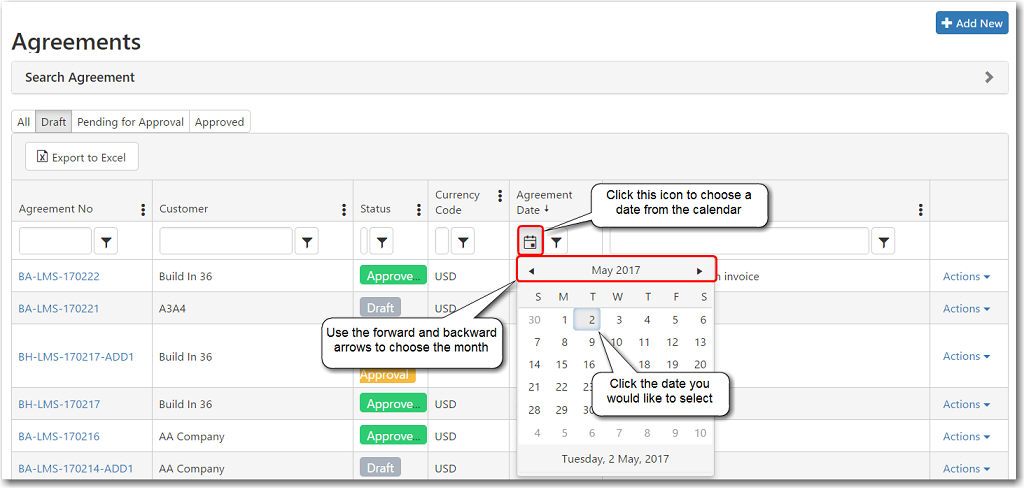
5. You can also filter for records based on dates as well. Under any Date column, click the calendar icon, and from the calendar that appears, choose a date by clicking it.
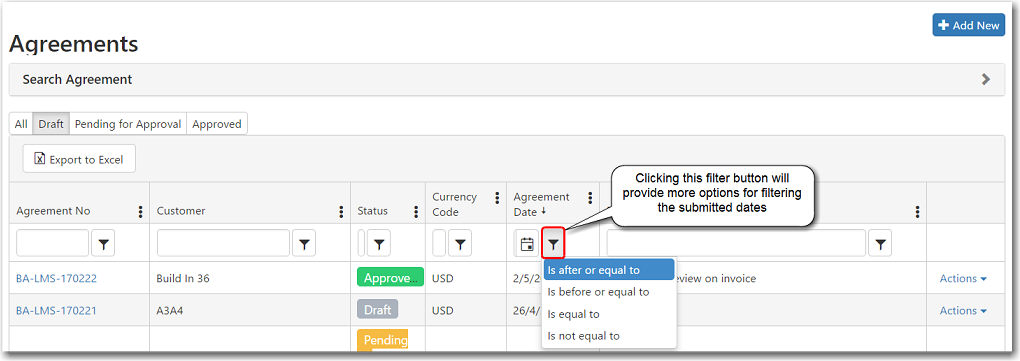
6. A more specific filter for the dates is available when you click on the Filter button.
The following table explains the operators available:
|
|
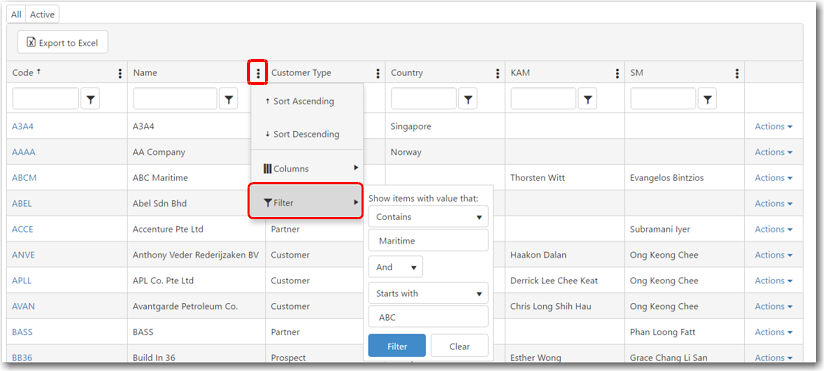
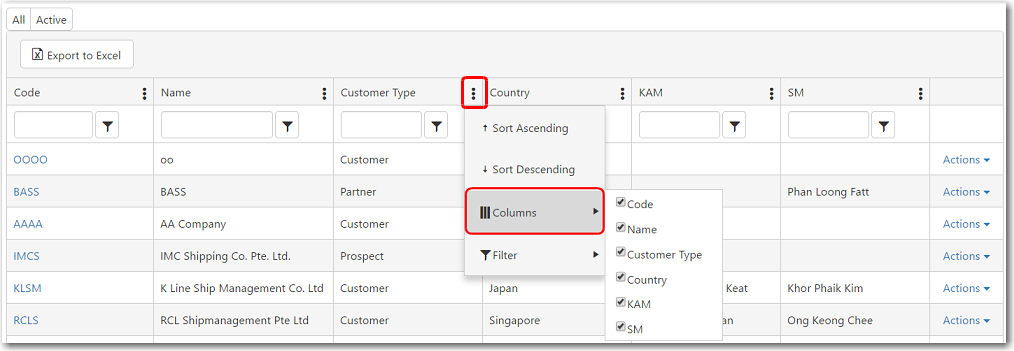
To customise the column view:
Note: This option allows you to hide or show specific columns in the record listing page.
1. Click on the icon to the right of the column header. A drop-down menu will appear.
2. Mouse-over the Columns option and a further drop-down menu will appear.
3. Clear the check boxes of the columns that you do not want to display in the record list. Only columns whose check boxes remain selected will be displayed.
4. The changes will be immediately reflected in your listing page.
|
![]() What would you like to do?
What would you like to do?