To edit the application settings for CRM:
1. Go to the Administration tab and click Application Settings.
The Settings screen will be displayed.
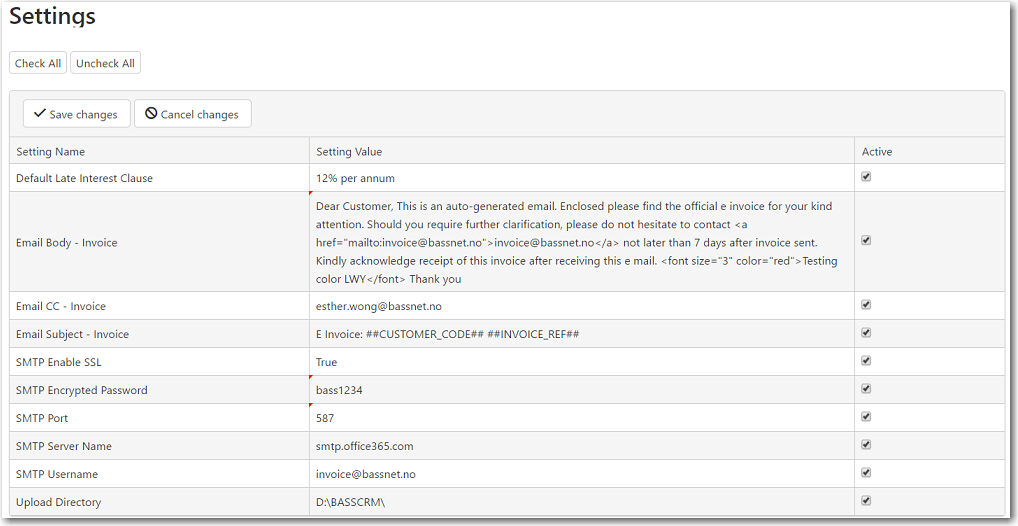
2. Click any of the fields under the Setting Value column to make changes to the values.
The following table provides you with more information on the available settings:
|
Field |
Description |
| Default Late Payment Interest Clause | If this setting is active, the System will automatically populate the Late Payment Interest Clause field with the value saved when creating a new agreement. |
| Email Body - Invoice | Insert the content of the email that will be sent to the recipient together with the invoice. |
| Email CC - Invoice | Insert contact(s) to CC when sending the email to the recipient together with the invoice. |
| Email Subject - Invoice | Insert the subject of the email that will be sent to the recipient together with the invoice. |
| SMTP Enable SSL | Specify whether SSL is used to access the specific SMTP mail server. (True or False) SSL is a standard security technology that provides communication security over a computer network. |
| SMTP Encrypted Password | Enter an encrypted password to access the SMTP mail server. |
| SMTP Port | Specify which port to use for your SMTP mail server. For example, 25, 465, 587, etc. |
| SMTP Server Name | Enter a name for the SMTP mail server. |
| SMTP Username | Enter a username for the SMTP mail server. |
| Upload Directory | Specify the destination path to which files will be uploaded in CRM. |
3. To activate these settings, make sure that the check box under the Active column is selected.
You can also click Check All or Uncheck All to select or remove the selections, respectively, for all the check boxes under the Active column.
4. As you make changes to the items in the table, a red arrow will appear at the top left of the field indicating that there are changes that have not been saved.
Click Save changes to confirm.