To add a new activity for a crew member:
1. From the HR Manager main menu, click Profiles under the Personnel menu.
2. Ensure that the crew profile to which you want to add an activity has been loaded. Use the Personnel search field to search and select the relevant crew profile.
Note: To use a previously saved list of crew, click the search icon in the Personnel search field to use the Personnel List feature on the Simple Search window. Use the drop-down function to select and load a list from the Personnel List section and click a crew member from the Search Result section to view his profile.
3. After you have loaded the crew profile record, click the Activity tab.
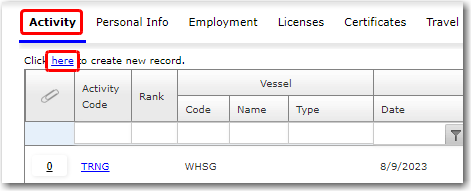
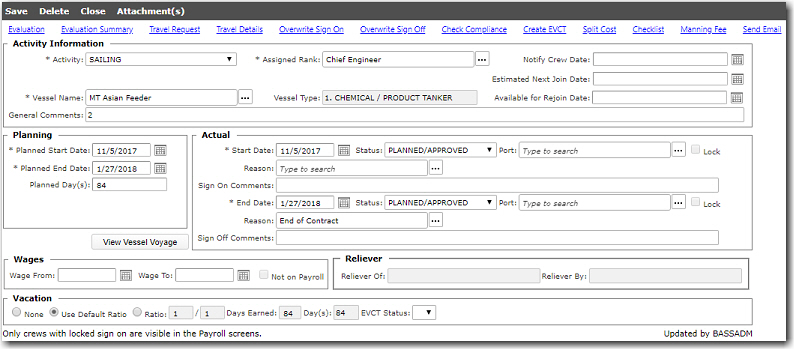
4. Click the 'Click here to create new record' link to create a new activity record. On the Activity screen, enter information in the following fields:
|
Field |
Description |
|
Check Compliance |
When this link is clicked, a validation will be carried out for Actual Start Date, Actual End Date, Rank and Vessel. If the record passes validation, the Check Compliance pop-up window will be displayed. |
|
Activity Information: |
|
|
Activity |
Use the drop-down function to select an activity for the crew member.
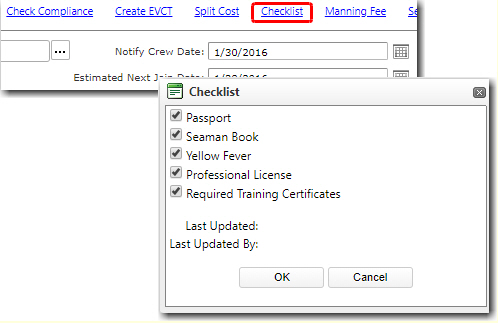
Note: For Standby Activities: In order to create a standby activity for a crew member, that crew member must already have a future planned activity on that same vessel (this is if this configuration setting has been carried out in your HRM System). The Checklist for the future assignment must also have been completed.
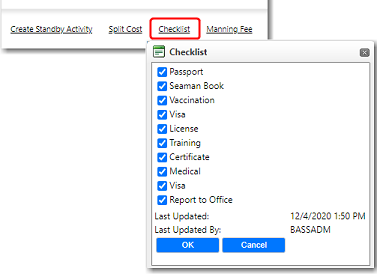
The Checklist feature can be accessed by selecting an Activity record and then clicking the Checklist link. Select the relevant check boxes to indicate an item as being completed:
|
|
Vessel Name |
Use the Lookup function to select the vessel to which the crew will be assigned. This should be based on the activity that you select. |
|
Vessel Type |
The type of the vessel selected in the Vessel Name field will be automatically displayed. |
|
Assigned Rank |
Use the Lookup function to select the rank the crew member is assigned for the selected activity. |
|
Notify Crew Date |
Use the Lookup function to select the date the crew member is notified of his assignment. |
|
Estimated Next Join Date |
Application for 'SAIL' activities. Enables you to select the estimated date the crew member will be joining the subsequent vessel after the current activity has been completed. When you click to auto-create the EVCT, the end date of the EVCT will be taken from this field as this will be the date the crew member joins his next vessel. |
|
Available for Rejoin Date |
Use the calendar function to select the date the crew member is available to rejoin the vessel. |
|
General Comments |
Enter any comments pertaining to this activity. (Note: Any comments entered here can also be seen displayed in the pop-up when you mouse over the crew member's activity on the Fleet - Crew Planning - Planning Overview screen.) |
|
Allocation Type |
This field will only appear if the 'Allocation' check box is selected for this activity in the Activity Register. Use the Lookup to select the allocation type code to indicate the cost allocation for this activity. |
|
Planning: |
|
|
Planned Start Date |
Use the calendar function to select the date planned for the start of this activity. When the actual sign on takes place, the Start Date field should be updated to reflect the actual date. |
|
Planned End Date |
Use the calendar function to select the date planned for the end of this activity. When the actual sign off takes place, the End Date field should be updated to reflect the actual date. |
|
Planned Days |
This field will be auto-calculated based on the Planned Start and End Dates entered. |
|
View Vessel Voyage |
Click this button to view the Vessel Voyage screen. You can select a vessel and then view the voyage plans created for it. |
|
Actual: |
|
|
Start Date |
The actual start date of the activity. |
|
Status |
Use the drop-down function to select the status of the crew in relation to this activity, for example, whether he is on 'Standby' for the activity, etc. When a crew member signs on to the vessel or signs off, update the status to 'Confirmed'.
Note: If the Global Settings for the vessel has been set to lock the activity upon sign on, then Office Users will not be able to edit this activity once the sign on has taken place UNLESS they have been granted special access rights. However, Vessel Users will still be allowed to edit this activity. Take note that only crew members with a Locked Sign On will appear on the Payroll screens.
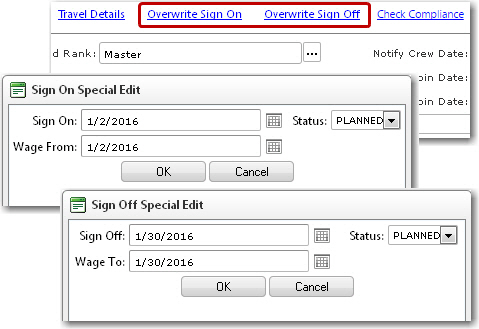
If an Office User has been granted special access rights to overwrite the Sign On/Off, he can select an Activity record and click either the 'Overwrite Sign On' or 'Overwrite Sign Off' link. Depending on your selection, either the Sign On Special Edit or Sign Off Special Edit pop-up window will be displayed:
Amend the dates and status as required and then click OK.
|
|
Port |
Use the Lookup function to select the port at which the activity will begin. This is based on the activity selected. |
|
Reason |
Use the Lookup function to select the reason as to why the crew member is signing on. |
|
Lock |
Select the check box to lock the sign-on information to prevent further editing. Only crew members with a locked sign on will be visible in the Payroll module. |
|
End Date |
Use the calendar function to select the actual end date of the activity.
Note: A back-end System configuration is available where, if the configuration is turned on, the system will automatically display this date in the Next Availability field on the Personnel - Profiles screen. Please contact BASS Support if you wish to include this feature. |
|
Status |
Use the drop-down function to select the status of the crew at the end of this activity. |
|
Port |
Use the Lookup function to select the port at which the activity will end. |
|
Reason |
Use the Lookup function to select the reason as to why the crew member is signing off. |
|
Lock |
Select the check box to lock the sign-off information to prevent further editing. |
|
Sign On/Sign Off Comments |
Enter any comments pertaining to the actual activity.
If no comment is entered, the System will display an automated comment detailing the relevant Training's applicable training description, certificate code, training center code, country code. |
|
Wages: |
|
|
Wage From and To |
Use the calendar functions to select the appropriate dates. This information will be synchronized to the Payroll module. The dates for wage payment will be based on the dates entered in these fields. |
|
Not on Payroll |
Select this check box if the crew member is not on the company's payroll. |
| Reliever: | |
|
Reliever Of |
The person the crew member is relieving in an activity.
When you mouse over this field, a pop-up will appear displaying details of the person the crew member is relieving. A Profile link is also available in the pop-up, and clicking this link will open the respective crew member's Profile screen. |
|
Relieved By |
The person relieving the crew member in an activity.
Note: When you mouse over this field, a pop-up will appear displaying details of the person the crew member is being relieved by. A Profile link is also available in the pop-up, and clicking this link will open the respective crew member's Profile screen. |
|
Vacation: |
|
|
Use Default Ratio |
Select this radio button if you would like to use the default ratio that has already been pre-defined by your company in the system for earned vacation time. |
|
Ratio |
Select this radio button if you would like to specify a ratio for the calculation of the earned vacation days. The Days Earned field will be automatically populated based on the ratio entered while the Day(s) field will be automatically populated based on the actual start and end dates of the activity.
Note: If you have selected the Ratio radio button, the system will not allow you to save the Activity until you have specified the relevant ratio.
The system will calculate the ratio based on the following setting options (the options below are based on priority level, 1 being the highest priority and 4 being the lowest): 1. The number of Leave Days and Working Days (on the Employment Contracts screen). 2. The VACDAY cost element details under the Wages screen - Wages Details tab. 3. The number of Leave Days and Working Days (on the Manning Requirements screen for the selected manning scheme). 4. The ratio as set in the CNPNRATIOEARN/CNPNRATIOWORK system configurations.
|
Note on the duration of the activity (as set in the Planned Start Date and Planned End Date fields): A back-end database-controlled configuration is available to allow you to specify the maximum length (in number of days) that can be set for an activity when planning it before an informational message is displayed by the System. For instance, if you specify this configuration as ‘365’ days and then attempt to create a new Activity with a duration that equals to or exceeds 365 days, the System will display a message indicating the length of the activity you are planning. You can choose to proceed or stop. This is to ensure that a realistic date is entered for the activity. Please note that this feature is a back-end database-controlled configurable feature. If you would like to explore the option of including this feature, please contact BASS Support.
Note on change to Reliever: If a crew member who has been assigned as a ‘Reliever’ for another crew member is removed from the Reliever relationship because there is a change to the Vessel name for the Reliever’s relevant Activity (under the Activity Information section), a message will be displayed giving you the option to notify other users that the crew member has been removed as a Reliever. If you elect to send the notification, an email window will be displayed for you to send details of the Reliever’s removal to other Users.
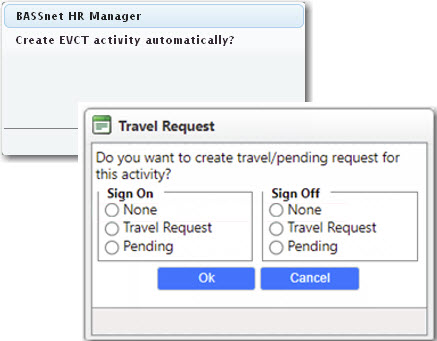
5. Click Save after you have completed your entries. A pop-up message will be displayed asking you if you want to create an EVCT activity automatically, where you can either choose Yes or No. Then, a Travel Request pop-up window will be displayed asking you if you want to create travel requests/pending travel requests for the activity. Select the relevant radio buttons to make the travel requests or click None, then click OK.
Note on Wage Validity: A back-end System configuration is available where, if the configuration is turned on, the System will check for any expired or invalid wages in an Activity or an Account Period and prompt you if any were found. The configuration can be set to either allow you to continue after the prompt or stop you from proceeding until the expired/invalid wages have been resolved. Please note that this feature is a back-end database-controlled configurable feature. If you would like to explore the option of including this feature, please contact BASS Support.
Note: If your System Administrator has turned on the Check Compliance auto-prompt feature, then when you Save the Activity, the Check Compliance pop-up window will display the validity of the selected crew member's licenses or training certificates. This pop-up window will only be displayed upon saving the activity. The Check Compliance screen can also be accessed by selecting an Activity record and selecting the Check Compliance link.
On the Check Compliance screen, the System will also display the number of cabins that are available/occupied in a vessel. This information is taken from the vessel’s Vessel Particulars – Owner tab – Manning sub tab – Accom. Available field.

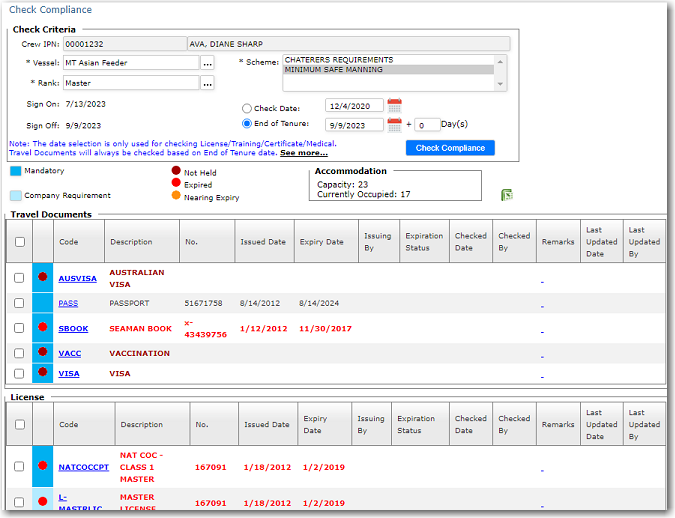
For travel documents that are expired or doesn't comply with the requirements, select the check box on the left and click Create Document Request to directly request for a compliant/valid document.
Select the check box on the left and click Checked to indicate that you have checked the compliance of the document. The Checked Date, Checked By, Last Updated columns will be updated accordingly. To remove the Checked Date and Checked By information, click Clear.
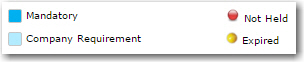
Note: The second left-most column in the tables on this screen indicate whether the document is Mandatory (column for the record is displayed in a blue shade) or a Company Requirement (column for the record is displayed in a light blue shade). Indicators will be displayed in this column when the document is Not Held (denoted with a red indicator) and Expired (denoted with a yellow indicator). A legend is available on this screen for information on the various colors used in this column:
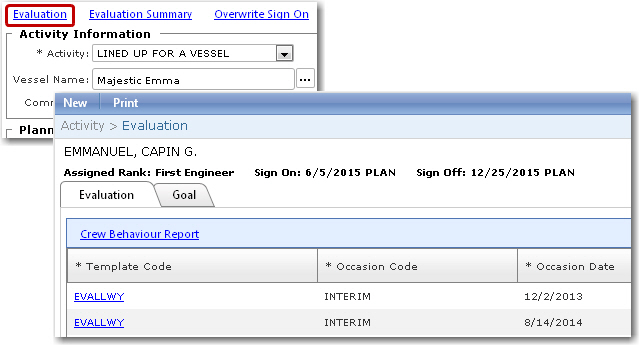
Note: You can select a particular Activity record on the Activity screen and click the Evaluation link to enter details of the crew member's evaluation during the activity. On the Evaluation screen, you can create a new evaluation record and also access the crew member's Crew Behaviour Report.
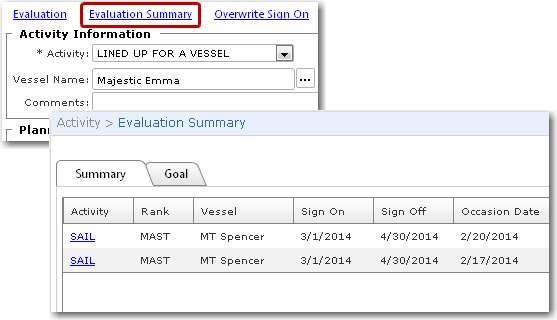
Note: You can select a particular Activity record on the Activity screen and click the Evaluation Summary link to view a summary of the crew member's evaluations and goals.
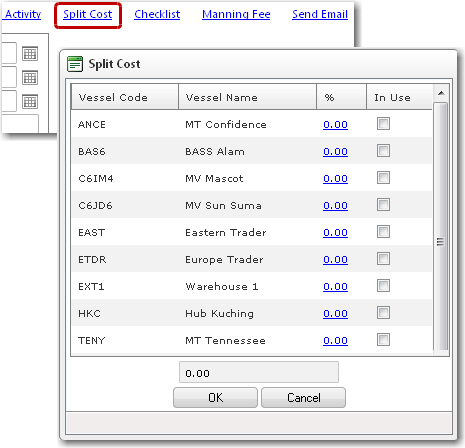
Note: You can select a particular Activity record on the Activity screen and click the Split Cost link to indicate the percentage of the cost that will be borne by the different vessels. The Payroll module will then carry out the calculations as necessary.
Note: You can select an Activity record and click the Checklist link to update the checklists for the activity. Select the check boxes and click OK to update.
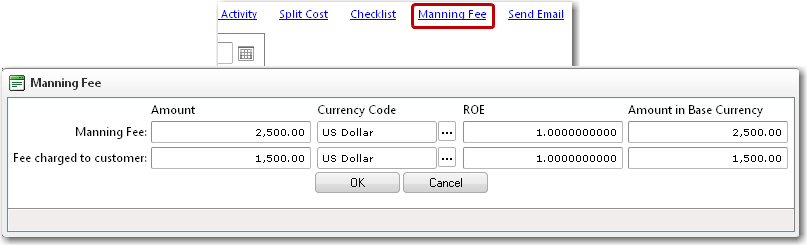
Note: You can select an Activity record and click the Manning Fee link to enter the details of the manning fees. You can further indicate if any amount is to be charged to a customer, as well as specify the currency rate of the entered amount and view the amount in your System's base currency. The System will calculate the rate of exchange automatically.
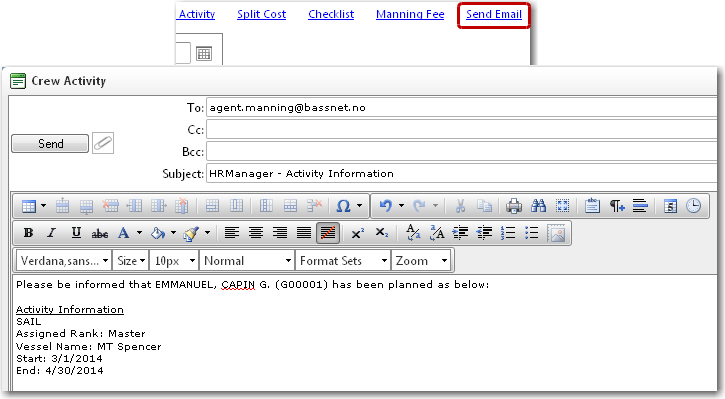
Note: You can select an Activity record on the Activity screen and click the Send Email link to email the details of the activity to the crew member's Manning Agent.
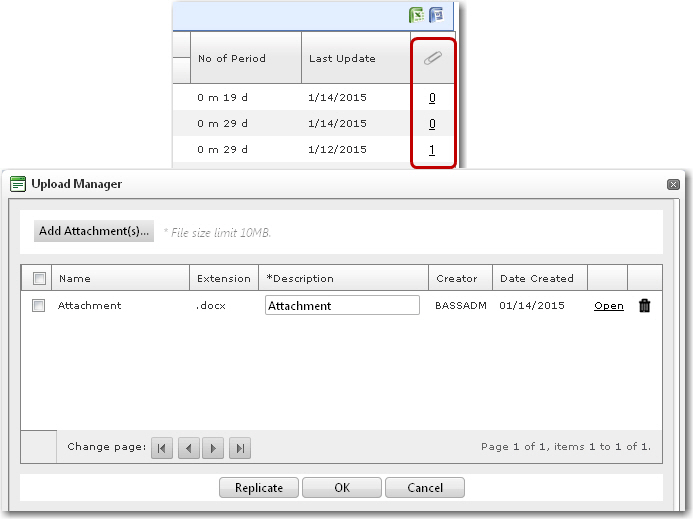
Note: On the Activity screen, you can click in the Attachment column to upload any attachments, if needed. The Upload Manager will be displayed. Click the Add Attachment(s) button to browse and select the attachment that is to be uploaded. Click OK. The attachment will be uploaded and can be accessed the next time from the Upload Manager. To launch the Upload Manager again, simply click in the Attachment column.
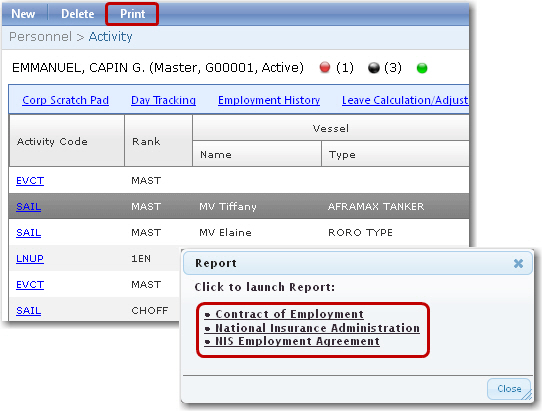
Note: On the Activity screen, you can print out reports for each crew member for each activity. Select an Activity record and then click Print. A Report pop-up window will be displayed where you can then click the report that you want to generate. If you do not select an activity record first before clicking Print, the System will not generate your selected report.
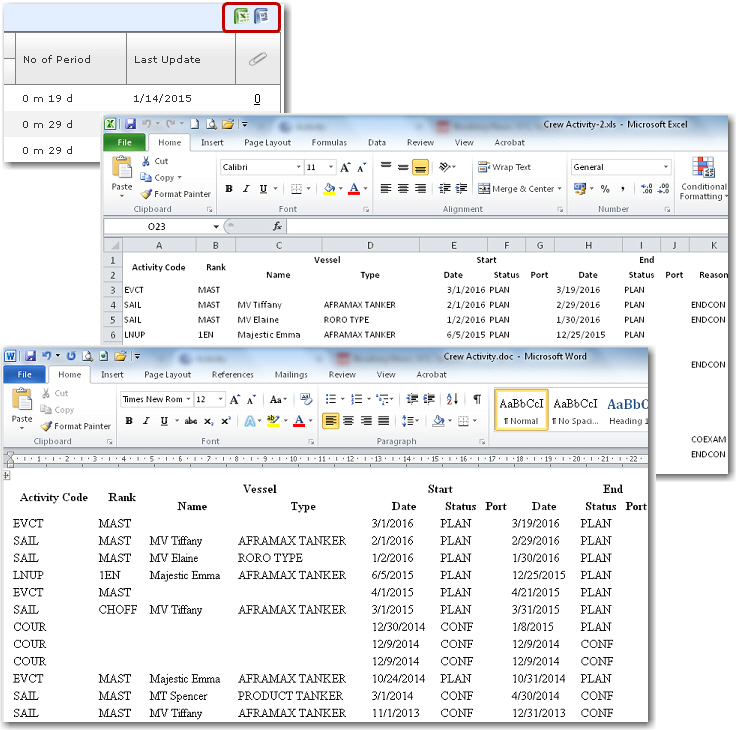
Note: On the Activity screen, you can click the icons at the top-right of the table to Export to Excel and/or Export to Word ALL of the crew member's activity records to a Microsoft Excel and/or Microsoft Word file.